Tuesday, June 14, 2011

Turning Thrift Store Art into ...um... art.


I'm a StumbleUpon addict (It's a firefox and chrome add-on), and I find my self 'stumbling' for waaay too long at a time, but it often turns out to give me some great ideas. For instance, Stumble threw me to an article on altering thrift store art. From there, I fell in love.

My girlfriend an I were dropping off some donations at the local Good Will, and I found a print of painting by Ruane Manning for $2.75. It was all framed up and everything. The frame was in bad shape, and the plexiglass was scratched to pieces, but the art was completely intact!...until I bought it.

I've taken cell phone pictures of the painting, after I 'finished' it, and they ended up blurry. I'm posting them anyway, given the subject matter (which should always be photographed in blurry conditions), and the fact that I don't own the rights to Ruane Manning's original piece. I wonder if parody laws come into effect on this?

Wish me luck in trying to get this new Bigfoot painting hung successfully in my dining room (sans protests!)

Tuesday, June 7, 2011

Airbrushing shirts II - weird discovery about myself

Yesterday after writing my post about the shirts, I felt oddly compelled to make another shirt. I went researching online for some cool '80s cartoon character, or just cartoon in general that I liked, but didn't remember. I'd decided that I wanted a cartoon shirt.

I went to retrojunk and was browsing through the list of '80s shows when I found Saturday Supercade! It was a bizarre show on CBS back in 1983 and 1984, based on coin-op arcade games. The show was segmented into different mini-shows, each based on a different game. I only vaguely remembered the show, but I remember a bit of it that I LOVED. My favorite segment, for whatever reason (I was six and seven when the show came out...who knows why you like anything at that point), was based on the game, Kangaroo.

Kangaroo wasn't a stellar game, nor anywhere close to the top of my favorites, but apparently the cartoon had huge impact on me. I found it's mini intro on youtube and was immediately a six or seven year old kid again. I knew I had to have K.O. Katie as my newest shirt, then.

So, now the shirt is done, and I'm left with questions. Why on Earth did I spend hours painting a shirt with a character nobody remembers? Heck, I barely remember her, but I do remember that I thought she was awesome. Maybe it's because she punches monkeys? I have no idea. Why does a half-remembered show like 'Saturday Supercade' hold any power over me what so ever? Am I just really really weird in having a fixation on a barely remembered bit from my childhood, or does this happen to other people? If you have answers or similar experiences, let me know! I'd love to hear about it. Especially if you loved K.O. Katie, too!

Monday, June 6, 2011

Airbrushing shirts

I've been playing away with my new airbrush, and I finally have things worth showing for my troubles! I've been airbrushing t shirts (the classiest of all things to airbrush).

The brown shirt is mine, it's a winged frog, the black shirt is Sarah's. It's me in a gas mask...I'm guessing you already knew that though. Both of these shirts were heat set with an iron, and have made it through the wash, so we know the paint took. The frog shirt's wing faded just a bit near the edge, so last night late, I added a little paint, then heat set it again, for longer and hotter. Hopefully this time it will take.

Both are done using Frisket stencils that I designed. The frog is a particularly simple stencil. It's just the outline of the frog and an outline of the wing (as separate pieces). All the detail on it was added by hand. As a result, the frog was more fun to make, too.

I've gotten a few more blank shirts over the weekend, so I will be experimenting with different stencil types, air pressures for the compressor and what not, even more. I'm also considering trying my hand at some 'fine art' airbrushing, but I don't quite feel like I'm there, yet.

As you are aware, this has slowed down work on my dolls...but it also means that now I will be able to airbrush them instead of just normal brushing them!

Wednesday, June 1, 2011

Baby Robins


This spring, I had a robin's nest on my front porch, which is kind of cool, because I like birds. The mommy robin was kind of an ugly thing, as far as robins are different (her head looked too tall and too narrow front to back) but it made it easy for me to tell her apart from the other neighborhood robins when she was out and about.

Eventually the eggs hatched, and I got to watch the little birdies grow up over the course of a couple of weeks. Starting at the ugly 'fetus with a beak' stage, until now, where I still see one or two of them (I can't tell them apart), still sporting their little spots, hanging out with the mommy bird. The last picture was taken right before they all took off. I was outside (and probably what prompted their flight), so I got a very good view of their first flight. It was neat.

Thursday, May 26, 2011

Birthday!

Hi everyone. Sorry about the gap between posts, but I've been distracted. Aside from Brink and Mortal Kombat, I had a birthday. I'm now a billion years old...okay, 34, but it feels like too many for the amount of stuff I've gotten done.

Anyway, this is my haul from this weekend. I got a Dremel Drill Press, Flexible Shaft, and Router. I also got an airbrush! Yay!

Suffice it to say, I've got so many new projects now that I'm not sure what to work on, or what to show. Heh.

Not to worry, after I play with all this enough to be comfortable with it, I'll settle back into my old routine of working on stuff and letting you see it.

Friday, May 13, 2011

Fox Doll Update

Oopsie! I forgot all about posting yesterday!

Anyway, here's the fox head as of today. I tried posting earlier, but blogger was having issues. It is Friday the Thirteenth, after all.

I could have posted something deranged and messed up, as the date makes that kind of thing fitting, but I never go with what is fitting.

The fox here is going slow. I spend more time patching cracks than I do sculpting. Her little hands and feet will be polymer clay instead of paper clay, and for that I am happy. They should go pretty fast.

I also need to make a pattern for the body. I want hips and a bust on her, so it should be interesting to try to make...meaning I have no idea how I'm going to do it. I have the fabric and the paint for her head, though.

Updates as they happen! Have a good weekend!

Thursday, May 12, 2011

Cat Boxes!

I've been playing on and off again with pyrography (wood burning) lately. I've never really stained wood before though, so that step intimidated me. Having just completed a blasted Dr. Fate helmet has given me courage to try new media and techniques, though, so I've burned then stained these two boxes.

There would be more boxes stained, but unfortunately, I don't have the equipment to stain multiple boxes at once. I have to do them on at a time, because I don't have enough little goofy pyramids that I use to prop them up. I have no idea what the pyramids are called, but they come from hardware stores, and they are used to do things like prop boxes up while you stain them.

I'm a bit disappointed with how both of these came out. Staining the wood obscures a lot of detail, apparently. I need to try to either work with less detail, or with dark darker detail.

The secret I told you about a few posts ago? It's coming along just fine. I'll be talking it up, soon.

Wednesday, May 11, 2011

Dr. Fate Medallion


I was thinking of holding this post for a while, but to keep things chronologically balanced, I've went with it, anyway. This is Dr. Fate's Medallion. On my costume it will be holding his cape shut. It's basically a big disk (near the size of a CD). The disk is a bit of cardboard with bondo on it, painted gold.

The first image is a sort of 'how to' of how I made the thing, but in full disclosure, I honestly added a few drops of resin to the bondo to soften it, before I laid it to the cardboard.

After spinning out the shape and letting it dry, I cut away the excess cardboard, then sanded the whole thing down. I covered the edges of the cardboard with wood glue and putty to hide all the holes, then sanded again. Next it got a coat of gold paint, and today it got a light sanding and a second coat of gold. The weird texture on the finished picture is because the paint is still wet! It will dry fairly smooth (I hope!).

Sorry about throwing another costuming post at you, and yes, I'll do something not costume related tomorrow.

Side note, costume wise. I found out that the GameStop near me is giving away a copy of Batman: Arkham City in October, and is choosing the winner with a batman themed costume contest. Soooo, I've got two ideas in mind. Either I'm going to do Mr. Freeze, who will be an ultra complex costume, or The Scarecrow, who I've already got started. I'll let you know as the time comes closer...but I want a free copy of that blasted game!

Friday, May 6, 2011

A new kind of doll (for me)

Here's the head of the doll I said I was working on. The head is paperclay, which is something I've never worked with before.

The head was originally going to be polymer clay, which I am familiar with, but the core of the head expanded every time I baked it, causing the clay to burst. Burst, not crack.

Eventually, I went with the paperclay because it air dries, but it is messy and slow compared to polymer clay. I guess that's the trade off for it not being toxic.

The paperclay does crack, though. Every time it dries, I have to patch cracks. Fortunately, that's pretty easy. If you can tell by the head size, she's going to be a pretty big doll compared to what I normally do.

Her body is going to be cloth, but her hands and feet are likely to be polymer clay. As this doll is an experiment, I don't know what direction I am going, completely.

This doll owes some of it's existence to the Dr. Fate helmet. That helmet was my all consuming project for a few weeks. I didn't really work on anything except it. That helmet has given me the patience to tackle this doll and the unfamiliar techniques like paperclay and sewing. Wish me luck!

Wednesday, May 4, 2011

Dr. Fate Helmet Complete

It's finally done! The Dr. Fate helmet has been painted, and is complete! Now I can get back to my 'real' work, which includes things like fox dolls. Hehe

The next step in this set will likely be Dr. Fate's medallion. I don't plan on putting you all through a step-by-step on it, though.

For now, I will just say that the helmet is done, and I'm very excited about that. While I do plan on making an entire costume, the helmet is getting a place of honor in the living room, I think.

Thank you all for being patient while I did this blasted thing, and I promise I'll get back to the 'normal' stuff soon.

Until then, good luck with your own projects, and thanks for dropping by!

Monday, May 2, 2011

Dr. Fate progress

The Dr. Fate helmet is progressing. I've not posted in the last few days, but I have been working on it, daily. I just didn't think tons of posts that say "Sanded, added filler, sanded added filler" were very interesting, so I saved up until today.

I've been sanding and adding filler (Imagine that!), and trying different fillers as I came across them. I have used miliput, which is a two part epoxy, similar to plumber's putty, but mostly used by miniature train enthusiasts. I used some Squadron White Putty, which is mostly used as bondo for model cars, as far as I can tell. I've even just used more bondo, sand it off, add more. Ugh. It's frustrating that I can't get him smooth!!!

Yesterday, however, I found out about Rondo. Rondo is not an off the shelf product, but rather a mix of bondo body filler and fiberglass resin. It's more liquid than body filler, so it doesn't make air bubbles as bad. That's what I've added today. Wish me luck!

I've also bought some paint for the helmet, started my next mask project, which is slightly more and slightly less ambitious at the same time, and have been planning and buying materials for the new doll. I think she's going to involve a lot of hand sewing.

The picture for today is a painting of Dr. Fate, as I realized I was rambling on about this guy, but most people probably don't know who he is. That's what I hope to look like, once this project is complete!

Also, there is a secret in the works. More to come on that, later.

Thursday, April 28, 2011

Dr Fate helmet: Fiberglass and Bondo


So, I skipped some pictures, sorry about that.

The fourth Dr. Fate helmet, as I said, was close enough that I didn't feel the need to make a fifth one. The first picture is of me after I cut the helmet, to see how much of a gap was needed to be added. I didn't add as much as is shown there, but I took the picture just to give me an idea of the size. I'm very proud that my very first attempt at a sizing picture actually worked, by the way. I just held my phone away from me and clicked the picture.

After I got the sizing done, I added some fiberglass resin to the outside and inside of it, which made my studio stink so bad that I abandoned the room for a couple of days. Note, do this crap outside if you plan on doing it.

Next I reread everything I could find about turning pepakura (papercraft) files into wearable stuff, and started the awful task of fiberglassing the inside. I used fiberglass cloth and more of the resin for that.
Side note, the resin, the cloth and the bondo all came from WalMart. This stuff is easy to find. It is with the tools/automotive stuff, all right together.

Today, I sanded the devil out of the Fate helmet, inside and out. I wore a respirator, goggles, gloves, and long sleeves to do this, and I did it out on my front porch, that way my neighbors will fear me. I did it outside and wearing all that gear because I am slightly phobic of fiberglass.

Next up, as seen in the second picture, I covered all my hard work in a layer of goopy bondo body filler. Now my cool paper helmet is pink. Pink, and as hard as a car part, I might add. (Also, seen in the picture, bird poops on my porch. That's what I get for having a bird feeder)

Later, I'm going to be sanding down the bondo, fixing any gaps that show up, checking and rechecking the symmetry of it, then eventually painting the whole thing brilliant and gaudy gold.

More to come as I get there!

Also, as for my sculpting progress:

I cut down a styrene ball to the shape I wanted for a large doll's head, then sculpted the head in super sculpy. I didn't take a picture before baking it, but trust me, it was cute.

After baking, I found that my cute sculpted head had shattered. I started over, but I first reinforced the styrene so that it wouldn't expand or anything to cause another break.

I resculpted the head in super sculpy, baked it again, and again, it busted. GAH!!!

I'm not giving up on this doll, just so you know. The next step is trying my hand at paperclay for the first time. Pictures and what not will follow.

Monday, April 25, 2011

Dr Fate vs. Vacation

Pictured here is the first three Dr. Fate helmets. The third one was painfully close to right, but it was still too small. I also made a fourth one, but guess what? It's still a little too small!!! Gah!

The fourth one is close enough that I may simply mess with it a bit to make the helmet fully wearable. I can squeeze it onto my head, but only with a little distortion to the helmet. It also mashes my nose. I think I will cut into where the cheek parts meet the face part, and add a little paper to there to stretch it some. I'll let you know how that goes.

Next, I'd like to let you know that for Easter I went to Pigeon Forge, TN. It was kind of a sudden spur of the moment trip, but it was a lot of fun. So much fun that Sarah wants to go back there for her birthday in July. So, I guess that's what I'll be doing then.

We went to a petting zoo, and to Wonder Works, which were both kind of fun, but the petting zoo gets more revisit value, if you ask me. I petted a camel, some goats, a zebra, some deer, a zonkey and donkey. The goats win, in my opinion. Later, I may do a more in depth post about the trip, complete with pictures of me getting mauled by little animals.

The biggest thing to come out of this was that I was inspired to sculpt again. Pictures will come as soon as there is anything to show!

Tuesday, April 19, 2011

Dr Fate helmet continued

Not much to report, other than I made the second helmet bigger, and I used hot melt glue (a glue gun), which sped up the process A Lot!

The second helmet is STILL too small, so as I write this, I am printing a third helmet even bigger. I hope it works, because I'm running out of room on the pages.

The second helmet looks cool enough that I may salvage it for something later. I just wish that it fit.

Monday, April 18, 2011

Dr. Fate and Mortal Kombat

Over the weekend I have been working on a Pepakura Dr. Fate Helmet. I've highlighted Pepakura before in my post showing off my mini-nuke and Birdo papercrafts. The Helm of Fate is the same process, but I intend to harden it, finish it more completely and talk about every step along the way.

Unfortunately, my helm of Fate is too small! My gigantic head won't fit in it! I was frustrated with this, but I've realized it is an opportunity as well. Apparently, when using Pepakura for costuming, getting the fit right is something everyone struggles with. So, I've increased the size of the Dr. Fate helmet by 10% and I'm going to try again.

The first time I talked about papercraft, I said that I used white glue to hold the parts together. I did that with this helm of Fate too, but after looking at a ton of tutorials to figure out how to fix my sizing problem, I've learned that most costumers who work with this use hot melt glue. So, next time, that's what I'm doing too.

The helm of Fate was printed on mock A4 card stock. I say that it is 'mock' A4, because I couldn't find A4 cardstock anywhere in my city (I live in the U.S. and A4 is not a standard size here). How I got around the need for A4 cardstock was by buying 9"x12" cardstock and cutting it to size. Last night at around 1:30 a.m. I learned that this is not something I should have worried about.

In Pepakura Designer (not Pepakura Viewer, but if you are doing these papercraft things, you should download both), it is possible to change what size paper the pieces are printing on, and rearrange them if you need to. For the next incarnation of the Helm of Fate, I am printing it on good old American standard card stock ( 8.5"x11").

Next, Mortal Kombat. Any male of my age knows and loves Mortal Kombat. It was the excessively violent video game that came out in 1992, and caused a whole generation to fall in love with side scrolling, 2D plane fighting, and more importantly finishing one's opponents.

Tonight at midnight, Mortal Kombat 9 is available to the public! I have preordered a copy of it from Gamestop, and will be picking it up for my PS3, tonight. That means I am going to be up all night killing my enemies, and then dragging myself through the day tomorrow. Good times! Just like my childhood!

Until next time!

Wednesday, April 13, 2011

Building a cardboard shelf


Sarah's collection of Littlest Pet Shop figures was taking over her office. It honestly looked kinda obsessive and creepy, to be honest. She's got a billion of the things, roughly. She wanted a little shelf unit to display part of them on, but after months of looking for one, she still didn't have one, so I decided I would try to make one.

Let it be noted right now that I don't do carpentry at all. EVER. Wood was out, so I figured cardboard would work. I've seen some very pretty pieces of cardboard furniture out there, so I figured a shelf would be a snap. It really was, too.

I measured and cut six pieces of cardboard for the three shelves (two pieces of corrugated cardboard per shelf), then four pieces for the sides (two per side, again). I glued each shelf and each side together separately, clamping them together with clamps and clothes pins. I used Mod Podge to glue them together. Very simple stuff.

Next, I glued the sides and shelves all together using hot glue and masking tape, It was nothing fancy, but it worked well. I started with one side, and after the three shelves were stuck to it, I glued on the other side. I also covered the exposed edges of the cardboard with masking tape, just to make it cleaner for the next step.

Finally, I tore some sheets out of a book (don't worry, it wasn't a good book, and it had already lost a page or two. There was no reading it ever again, anyway), and tore them into little pieces. I used Mod Podge to glue them on, one at a time. After the whole thing was covered in paper, I went back over it with another coat of mod podge, and then left it to dry.

From start to finish, the entire shelf unit was only a few hours long project, and I think it turned out pretty nice. I wouldn't want to use it to store my weights, or an anvil or anything, but it's plenty sturdy enough for the Littlest Pet Shop critters.

Thursday, April 7, 2011

MEGA Post!

Austrich has been on me to update my blog, and he's right, I should.
First things first. This is my new gas mask. I found it at the Hickory Antiques Mall. It was $35, and I think it was worth every penny. Sorry for the bathroom pic, but I gotta get this show on the road, so I took the picture in the o
nly place I could (I had to use the bathroom mirror to aim the camera on my phone...you know, Facebook style). Anyway, that's me in the new mask, and I loooove it. It's a civilian gas mask from... God only knows how long ago. The leather that holds the straps together was hard as a rock and brittle. It's my new favorite one currently, though.

Nextly, without a photo, I've been doing quite a bit of 2D art with the colored pencils. I need to do a black dragon pic and then I'll upload a set of dragon drawerings. I've got a white one, a green one, a red one, and a blue one.


Nextly, the ghostly clown there started life as a sheet of plastic. That doesn't mean much to anyone other than me, I'm sure....but he's a HUGE step forward for me. My Vacuum Form table is complete!

The clown was pulled from a resin clown my sister gave me. He's spooky, and so I may make
a duplicate one in plaster soon, so I can have two of him!

The vacuum forming process is sooo much easier than I could have guessed, so I'll be doing a lot more of this in the future! Yay!!! Maybe I'll end up with my storm trooper armor, after all!

Next up is a Mario Question Block that I made and have hanging in my living room. Woo Hoo! It's kind of disconcerting, as it does look like it's just floating there. In actuality it's just hanging from the ceiling.

I've wanted to do one of these for a while, but I didn't have a good way to make it. Finally, I found a way. Hobby Lobby sells paper boxes of various shapes and sizes. I grabbed the biggest squarest box they had, tossed the lid, and painted it!

I made a grid on one side of the box, used tracing paper to copy the pattern that was going on it, then used carbon paper to copy the question mark onto the other sides. Inside the box is a block of styrene that fits snuggly into the box. The styrene is what the fishing line, which hooks the box to the ceiling, is embedded in.

Finally, I've been decorating my bedroom. The closet door has new hardware, there is viney stuff hang
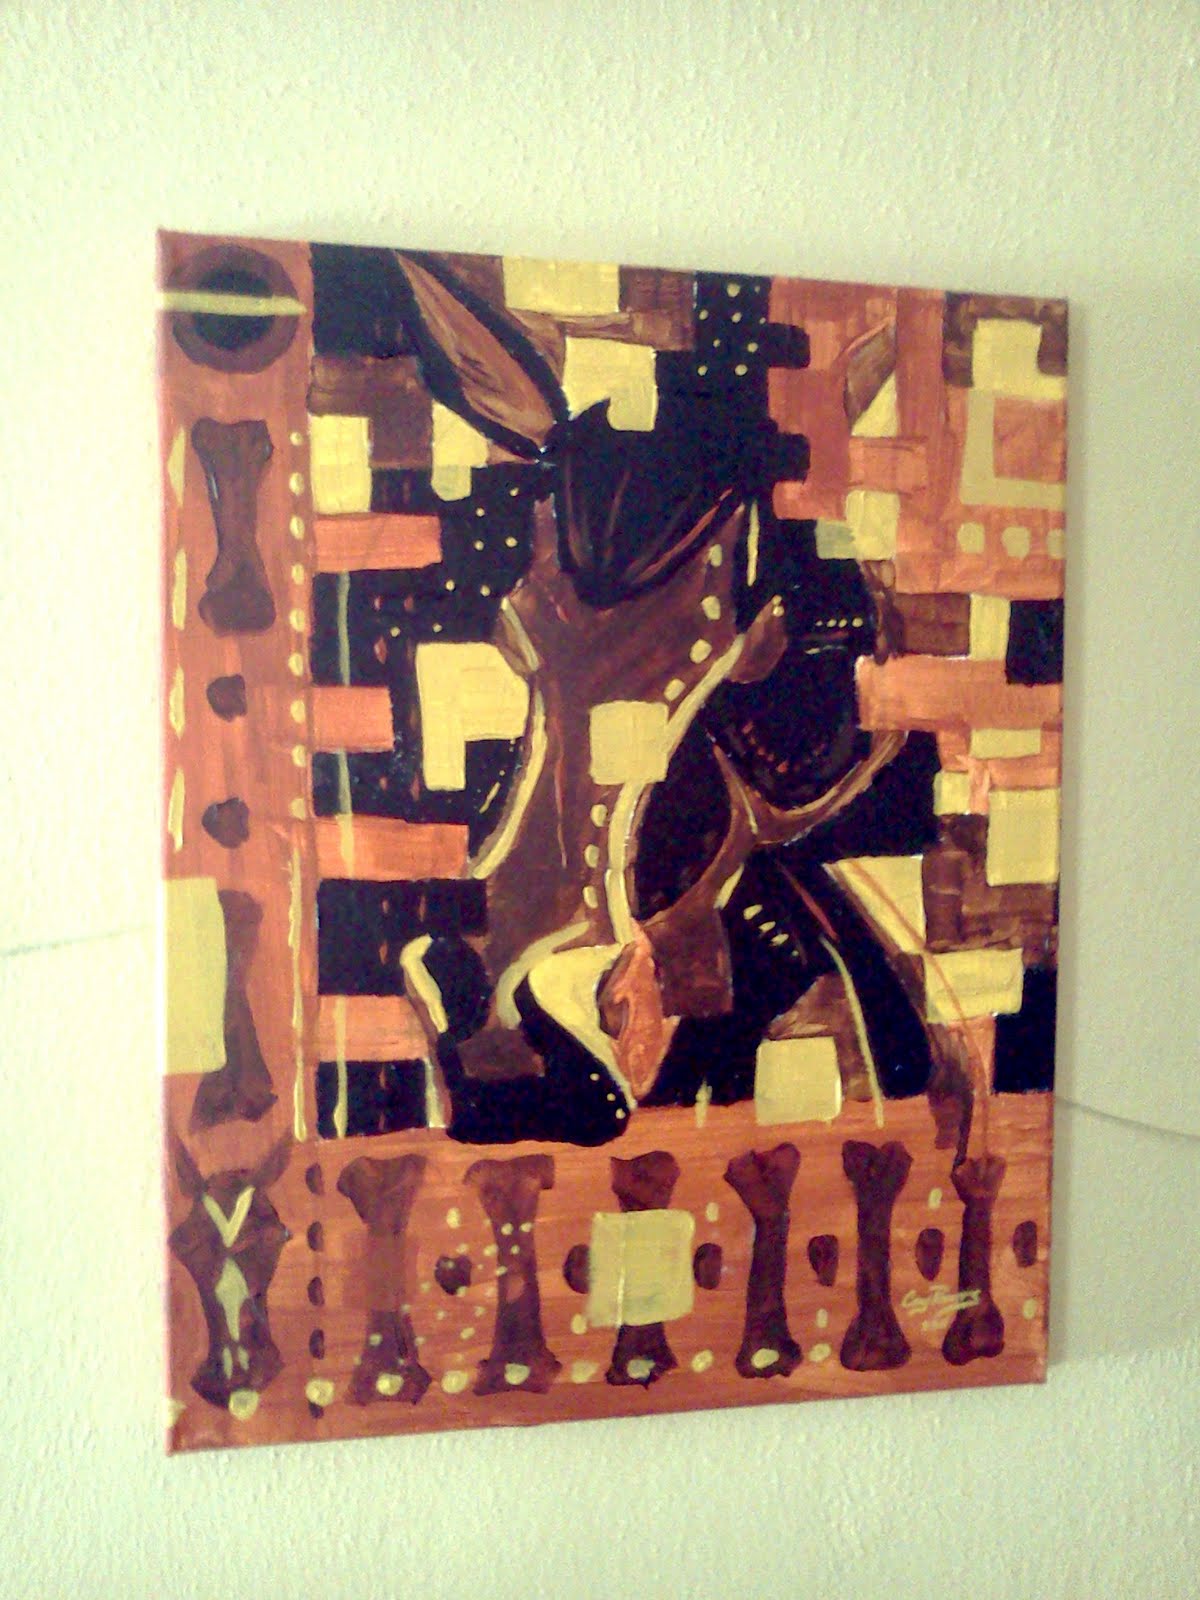
ing in the corners, and my story teller doll has moved to the mantle in there. There's also some weapons, lots of figures of foxes and fantasy thingies, some dragons and the like. Also, several of my fantasy paintings hang in there.

The gyphon over the closet door is made out of blue polystyrene. I just cut him out, shaped him up some with sand paper, and painted him black.

The viney crap (I don't know what plant it's actually supposed to be. Heh) is strung up along little nails near the molding at the ceiling. I just used floral wire to wire it to the nails and let it hang.


That's it for today.
Hopefully that will let you know some of what I'm up to, and satisfy Austrich. More stuff will be coming later!

Friday, March 18, 2011

Expensive tools make for cheap work

This kinda skanky looking fox was one of the first things I did with my expensive Prismacolor Pencils. I've been working like mad with them lately.

I feel that while the picture doesn't need explaining that I should talk about the pencils themselves.

I used them a few times prior to this picture, but I didn't use them well. I would lightly color in a few areas on a picture, but they ended up looking like any picture that I had used cheap colored pencils on. The reason was that I wasn't using them correctly.

Now, my intention is not to explain how to use them correctly, but to tell you why I was using them wrong. I was using them wrong because they were expensive. What a waste, huh? It's true though. The sheer cost of the pencils made me a little afraid to use them, and so when I did, I was timid with them. I don't know how common this is with artists, but it's a problem I'm constantly facing.

I used sculpey improperly at first, because I didn't want to waste any, I used acrylics too thinly because I didn't want to waste it...this goes on and on like this, but the truth is, it doesn't help me. The pencils are just the latest in this line of thought.

I know why too, and I still can't get past it! I grew up in a very very rural area where art supplies were not easy to get, and I grew up poor, so it feels kind of wrong to just play with something that costs a lot (which is subjective), but there's no other way to learn, really.

I'm writing this as a reminder to myself to not be intimidated by the cost of my materials, and so hopefully some other artist will read this and get over the same problem, because I imagine that it's not just limited to me. Good luck with whatever it is you do, and if you have any prismacolor pencils collecting dust, dust them off and get to it. They are awesome.

Thursday, March 17, 2011

Roofing part 3: A casualty

The roofers have claimed their first casualty in the whole 'rattling the house' bit. A jar baby (one of my first ones, not a candle) fell off of my 'specimen' shelf and busted. The baby is fine, but there was glass and water all over the floor.

I'm more upset that I didn't have the presence of mind to take a picture of the baby laying in the glass and puddle of water on my wood floor, than the fact that it broke. I'll just get him a new jar, no big deal.

Anyway, here's the little guy. He's a bit more deformed than what you can see in the picture. He has a little tail, and only has odd numbers of digits. He's made of super sculpy, with a little purple wash here and there to give him some color. The nasty peeled looking stuff on him is rubber cement...and yes, that look is intentional.

The water in his jar was discolored by a little bit of coke, and there were a few scraps of toilet tissue floating in there to look like bits of skin or flesh that had separated from the baby. I know it's probably not one of my 'deepest' works of art, nor is it even in good taste, but I love it. Heh.
Also, if this bothers you, let it be known that you came to a site that says 'Jar Babies and Art' right at the top, so you should have expected a jar baby sooner or later.

Anyway, the roof should be done tomorrow, so that's happy. Also, I've been playing with colored pencils, so I'll probably show that stuff off soon. The rat doll has been on hold because the hammering really kind of jars my nerves and makes me unable to do the little delicate work that I need to do to sculpt.

EDIT: The little baby has a new jar to call home! Here he is! He got some coffee in his water this time, because ...it was closer to the sink when I was filling him up.

Wednesday, March 16, 2011

Roofing part 2

The roofing thing is still going on, and it is so jarring that I can not concentrate on art. It sucks.

It also rattles every damned thing in the house, and terrifies the cats. The rattling is a worse problem, as I keep finding stuff that the constant hammering has knocked over. Nothing has broken yet, but I keep waiting to find something...then I'll likely loose my damned mind at a roofer and end up with a partially fixed roof, and broken stuff.

It really is nerve wracking. I hate the constant pounding and the shaking. Also, let it be noted that if they are tearing out your chimney, they will drop bricks down it, and that will cause soot to fly out everywhere...onto everything in front of the fireplace....which happens to be the backs of all your video games, if you set up your TV in front of the fireplace because the fireplace isn't usable. Trust me on this.

Ugh. Updates later on stuff.

Monday, March 14, 2011

Roofing

Sorry for the lack of updates in the last week. The damage to the house has been more severe than I was expecting, and right now I have guys climbing all over the roof ripping up shingles.

Apparently (just learned this) some of the boards under the shingles are split and/or rotten and so even more cash is getting thrown at the problem than was initially thought. Insurance doesn't care about that damage though, and won't pay for it. *sigh*

Sooo, that's where I am. Art is taking a back seat to fixing the house, currently. I'll let you know how it turns out, and hopefully this process won't take too much longer.

Thursday, March 3, 2011

Fake Taxidermy completed!


The taxidermy monster is finished, yay! Here he is in all his scanky looking, ill preserved glory.

The eyes were glass pebbles painted with red, gold and black, then wrapped in super sculpey. The nose and teeth were also super sculpy. His ears were just bits of craft foam covered in fake fur. His whiskers are bits of fishing line held in place with straight pins.

The head itself is anchored to the plaque with hot glue then a series of finishing nails all around the edge of him. The heads of the nails are just kind of hidden in the fur. The fur came from a thrift store ladies fake fur jacket. I covered the styrene form with masking tape, and just hot glued the fur over that.

Now I have this nasty looking head to stand guard outside my bed room, and I can move on to other projects. I'll probably get back to my slow slow process of making my rat girl doll.

Also, turns out I didn't lose TOO much in my studio thanks to the leak, so that's a good thing.

Tuesday, March 1, 2011

Weather Damage

Hi everyone, this is just a short update. Yesterday evening a storm tore though the area, and I was without power for about 10.5 hours. It also murdered my roof, and caused a leak in my studio, of all places *grumble*.

I'll probably end up having the house completely re-roofed, and I don't yet know the full extent of the damage in my studio. We'll see.

Last week towards the end of the week I was a bit under the weather (...but not a storm), so I didn't post anything because I just didn't feel good. I have been working on a few little things here and there, but I don't know if any of it is worth really focusing on, here.

The fake taxidermy critter has been given a full set of fur, his eyes, nose and teeth are in place. I just have to add some ears, possibly some horns, and sand and stain the plaque he's anchoring to. Pictures will be coming soon.

I also have done a couple of paintings I'll probably show later. Take care, and I hope the weather didn't destroy your home too.


Wednesday, February 23, 2011

The Gas Mask Girl

This little lady was the project I was talking about on Monday. She's way less complex than she looks, too.

I bought the figure at a little boutique called "Dollar Tree" for the unearthly sum of twenty-five cents. Heh. She was kind of plain with a pseudo-porcelain finish and shoddy paint job. Also, she had the unappealing trait of not wearing a gas mask.

I sculpted the gas mask straight onto the figure with super sculpey, then stuck the whole thing in the oven. I was halfway convinced that she would shatter in the oven and I would be out a quarter, but she survived just fine.

I took her outside, primed and painted her with spray paint, and here she is! I did a few other figures and variations of this theme. The black figure behind her was an angel also from Dollar Tree, and I did a couple of other pieces, including a piggy bank. All survived the baking process just fine.

Also, as an added note: Just repainting the figures with a solid coat of paint did wonders for them, even if you don't want to add silly details like gas masks. Good cheap way to decorate, if that's your thing.

Monday, February 21, 2011

Wall Sculpture aka Fake Taxidermy

Here's what I've got on the wall sculpture I mentioned earlier. Right now it looks kind of like it could be almost anything, but I swear to you, it will be a monster.

I have always loved the idea of having a monster's head hanging on my wall, and I've finally decided to do something about it. For a long time, things like the wooden plaque were stopping me from making one of these, because I honestly didn't know how to do things with wood (and I've got a mean sawdust allergy, so I really didn't persue it). Lately, I've been becoming more and more adventurous with my art projects on the whole, so I though it was time to tackle this guy.

The styrene was saved from a Christmas present, and the blue styrofoam (yes, real brand-name styrofoam...which is mainly just used for insulation...everyone calls all the expanded polystyrene 'styrofoam' but it isn't...only Dow's styrene insulation is officially 'styrofoam'. Fact of the day) was reclaimed scraps from some of my other projects. I often wonder if the the people at the hardware stores wonder why I show up once every few months to buy a single panel of insulation. Heh.

The glass eyes are glass pebbles that came from a hobby store in the floral department. I painted them on the back. They are going to get eyelids out of sculpey (I need to devote a post just to what I use sculpey for, because it's a lot). Not pictured are the nose and teeth (both made of sculpey) and the hideous fake fur coat that is going to make bulk of the surface. I don't know yet if it will have horns, or what the ears will look like.

Tomorrow, I may show my latest fast project, which is currently getting a paint job out on the back porch (Yay, heat wave!).

Friday, February 18, 2011

New Sculpture Project: Robot


Here's the parts I have so far for my newest doll/sculpture, which will be a robot, of sorts.

The little jar is going to be the main bulk of the robot, but there will be arms and legs and plates and parts, of course. All the parts around the jar are made of sculpey, with the exception of the gray circular thing with orange in the middle. It is a glass pebble with orange glow in the dark sculpey behind it and silver sculpey around the edge.

The brain with it's delicate little brain stem will be in the jar, suspended in clear casting resin. The whole thing will be sort of '50's movie monster robot, mixed with a bit of steam punk nightmare.

There's a lot more that needs to be done to this thing before it's workable, but there you go, an update as to what I'm working on!

Thursday, February 17, 2011

Some Paintings


The reason I have not yet finished the rat doll, or even made a TON of progress on her, is because I stop working on her from time to time to pursue other artistic endeavors. Like painting! These four paintings have all been done in the last couple of weeks, and are all acrylic, and all 16 inches by 20 inches on gallery wrapped canvas.

The first one is a gas mask, which is a theme I enjoy, and has a palate limited to four colors. The second, which I've tentatively titled 'Stable' is also a four color palate. The Fox painting, which I finished last night, has five colors, and the Batman Beyond painting (which is just something to hang over my action figure collection) has four colors. I used to be a little crazier with my palates, but I seem to do better work if I really really limit how many tubes of paint I am working with. Four seems to be the most common number of late, but I think I've done them with as few as three. I'm not yet brave enough to do a painting with just two colors, but maybe soon.

In doll news, I have cut and baked the arms, so the rat doll has elbows, but I've not yet hooked the hands to them. Currently, I've got a batch of clay bits in the oven for my other doll, along with some teeth I'm baking for a wall sculpture, more on the wall sculpture later.

Enjoy the rest of your day, and I will likely reveal more as to what I am making and working on tomorrow.

Tuesday, February 15, 2011

Rat Doll part 6: Arms

Here's the start of the rat arms. There's a few steps still to be done on them, but this is where I begin.

I rolled out a bar of clay, cut it in half and baked it for the arms themselves. These two rods will each make one arm. The hands were sculpted separate. I'd go into more detail on how to do the hands, but honestly, there's a billion other tutorials out there on hand sculpting that far surpass my attempts. For now I will just say there is no armature in either the arms nor the hands.

The next step, which I've not done yet, so no pictures... is that I need to cut the arms in two again. I'll figure out the length I want from shoulder to elbow, then cut where the elbow bends. I'll use a cutoff disk and my dremel for this. If the forearm is the right length, then hurray! I won't have to cut more off of it, but as it stands, I think I will.

The elbow and wrist will be sculpted onto the existing forearm/ upper arm/ hand, then the completed arm will be rebaked. I'll also add a knob to the inside of the shoulder to allow it to be stuck into the torso. That's the bit that will allow me some articulation, later.

Monday, February 14, 2011

Valentines, Secret Doll, Blogger issue


So, first let me just say that adding three pictures apparently makes my layout a mess, and I can see that. Ooof.

Next, this is the secret doll that I kept talking about but not showing. It was a Valentine's present, and she reads the blog from time to time, so I couldn't show it until I gave it. It is an articulated raccoon doll. His tail is all flexy, and he's stable enough to sit or stand. The third pic (of his butt) was to show off both his balance and his tail. This doll was built along similar lines to what I'm doing with the rat doll currently, so a 'how-to' is slowly forming for this thing.

The little animals around the raccoon in the picture are Sarah's Littlest Pet Shop figure's. I find them to be a little spooky, but she loves them. Eh, whatever. The long cracked looking thing in the background is a base left over from some of my Star Wars figures, which is a much better use of plastic than little bobble head animals, in my opinion.

Okay, so I've covered Valentines and the Secret Doll, so I'll get to the last thing. My blogger dashboard is missing all of the blogs I follow. I don't know if this is a temporary issue, or if the blogs I follow just all shut down at once, or if I was an idiot and clicked something that I shouldn't have...I'll look into it. *grumble*

As an update, I've done a few paintings that will get some attention later, and I'm starting on a new doll that will be less poseable and more...nightmarish.

Thursday, February 10, 2011

Rat Doll part 5?


I've not done much to the doll that I've not already said, but here are some pics, anyway.

The first picture shows a close up of the head with the eyes sculpted on. The ears, paint job and hair are about the last things that need to be done to the head, so you'll likely not see it again until it's nearly time to assemble the doll.

The second picture is of the torso. I've drilled out openings for the neck and arms (which don't even exist yet). The neck has been dry fit into place, and works okay for now, but I may end up doing some fine tuning on the hole before the doll is finished. The holes were carved out with my dremel and a carving bit.

I also sanded down quite a bit of the body, though I'm not sure of how much you can see that in the picture. Some detail work is going to be added to the body, and quite a bit more smoothing. This sand was more of a 'shaping' sand than a polish.

Next up are the limbs, I've already sort of started the arms, but I will go into what is involved with the arms and legs in greater detail later.

Wednesday, February 9, 2011

Insomnia, Updates, Robots, Etc.


So, I got to sleep at about 8 a.m. this morning. Long long long hellish night. It sucked. I think I've talked about insomnia before, so we'll move on.

The rat got another bake, but I don't feel like this step warrants pictures. She's got a bigger bust and butt now, and she has 'eyes' of a sort. Nothing else changed at all, so no pictures, yet. I've also started very roughly on her limbs, and I will post about them specifically later.

Today in my haze of having slept the morning away, and having a sleepless night, I went to TED.com to watch some sort of educational/science-y video to try to motivate me into doing stuff. What I got was actually a bit of a revelation. I realized why I make the things I do. I watched a talk by Cynthia Breazeal, who makes robots.

What I realized is that I make dolls, puppets, and the like because what I REALLY want is robots. I don't know how to make robots, but that seems as close to 'playing God' as one can get. Creating something that looks and acts like a living thing. Puppets come a bit closer than dolls, but you have to animate them yourself, of course, and that's fine. I LOVE puppets. Baby New Year, from the first post of the year is a simple rod puppet, but it still gets some expressive quality from that. I want to make more advanced puppets, but I tend to hit a wall in what I am able to do, versus what I want to do.

The whole idea of robots fascinates me, and not just because I want to mimic life. I don't see them as being creatures but more as being puppets with mechanical parts....which made me realize that a puppet I've been wanting to make may be actually doable if I buy a robotic arm kit. Honestly, I currently have two ideas for puppets that could use a robotic arm kit. If I manage to get a robotic arm kit (they are around $50, and you have to build the thing yourself, so there's some question as to if I will do this), I can tell you that I will probably do something really weird with it, and you will get to see it!

The photo today is Leonardo, a robot that Cynthia Breazeal made. He's pretty awesome and amazing...and kinda cute, so I figure he was a good example of what I want to do, even if it's not what I can do.

Tuesday, February 8, 2011

Rat Tail

Small update on the rat doll today. I made the tail, and here it is.

The tail is made from Bake and Bend Sculpey, which means it is flexible. Not as flexible as rubber, but way more flexible than super sculpey. This will let me attach it without fear of it breaking like a twig the first time I touch the finished doll.

The stained and paint splattered surface I keep taking these photos on is actually a cutting mat. The little grid is composed of one inch by one inch squares, so you can get a sense of scale.

As you can see from the tail's shadow, it isn't laying completely flat on the cutting mat. It is curved because I baked it on a wadded up piece of t-shirt in my pyrex baking dish. The cotton shirt doesn't scorch in the oven, and is a really good surface for cradling delicate sculptures while they bake. By having the cotton all bound up into a wad, I was able to droop the tail over it while it baked and not just leave the thing flat. Also, I always cover the clay with aluminum foil (not touching!) so that the clay doesn't scorch as badly.

The reason for only focusing on the tail today: I stopped work on the rat to do a painting. I'll probably show it off tomorrow. Now, back to work on the rat!