Thursday, January 27, 2011

Another Multi-Part Update

I've not finished anything except the squirrel girl pic, which apparently will become a tattoo! Yay! But I have made progress on all the other things I've been working on.

The bunnies for the kitchen cabinets are coming along. The fourth one is currently being set with Mod Podge so I can cut it out and glue it into the cabinets. I need six, so I'm halfway done! The three finished ones are awaiting their bunny brethren. I have all the fabric I need for both the bunnies and the backgrounds, so I expect that next week, my kitchen cabinets will be made over.

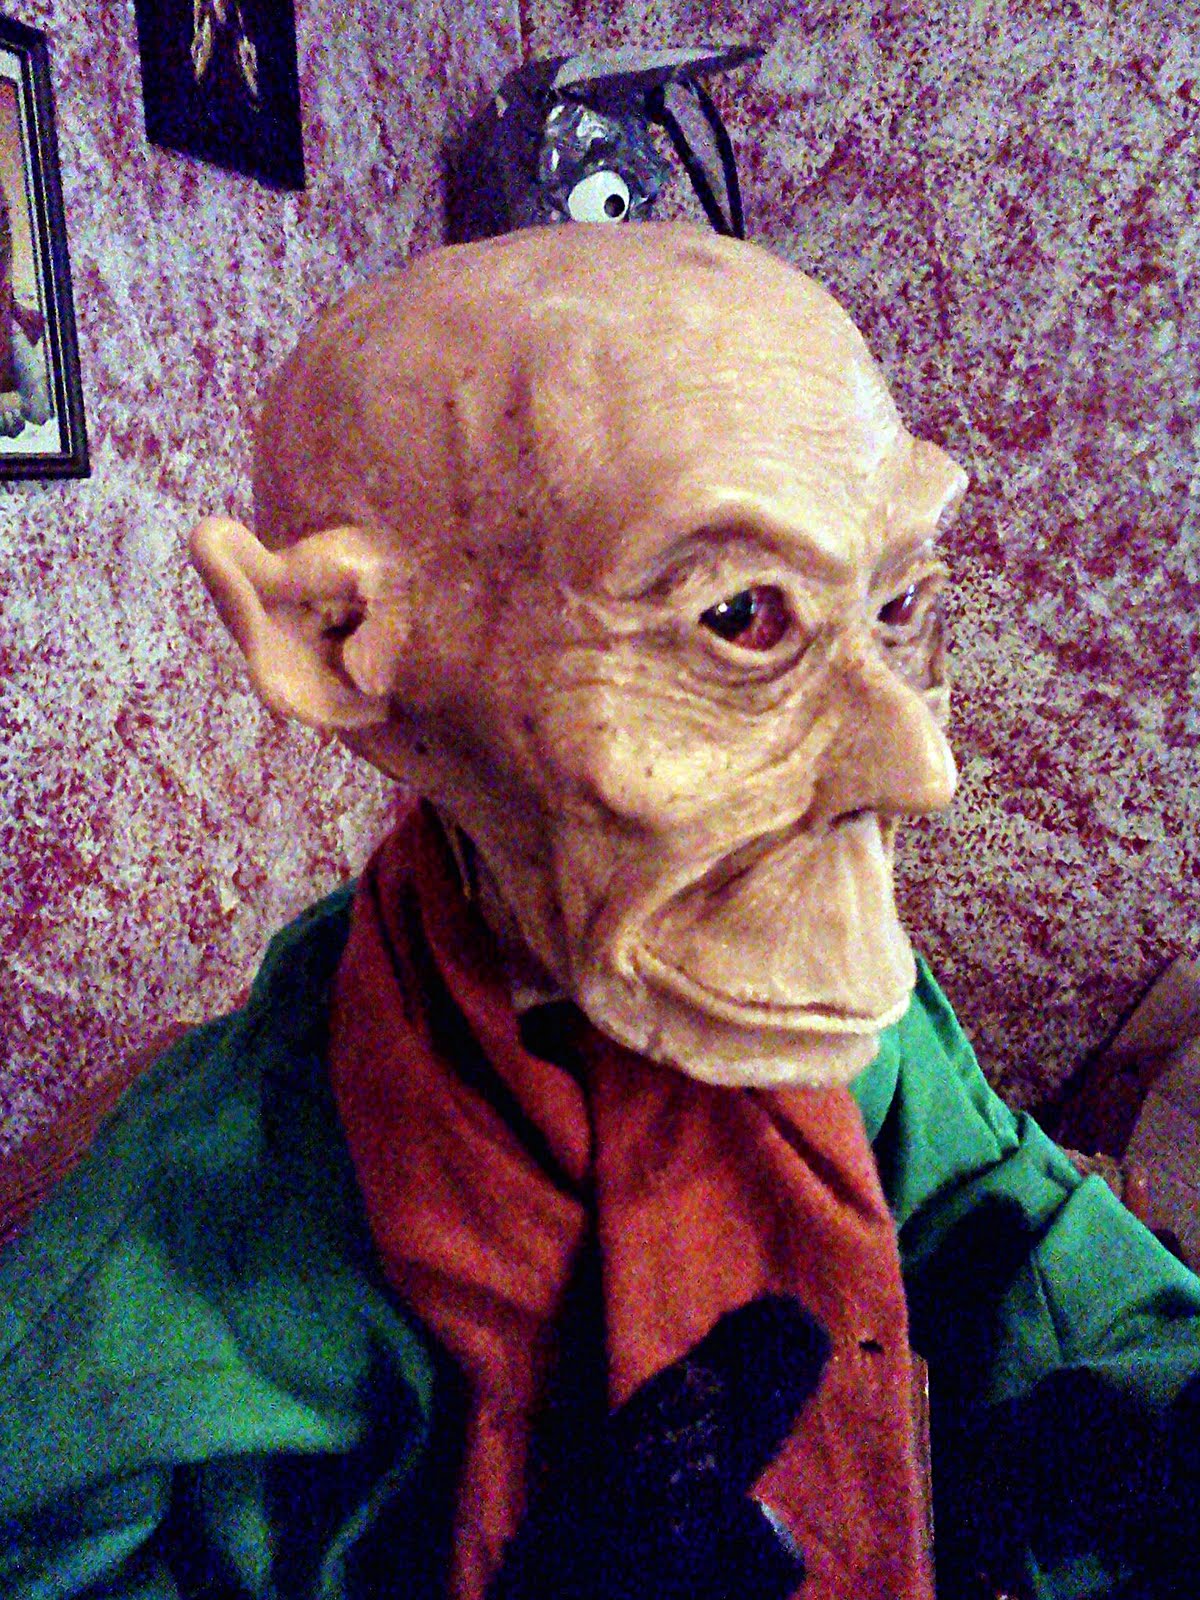
The light has been fluctuating and disagreeable for taking pictures of the Story Teller doll, but I'm excited to get them taken. I just need to figure out where to set him for the pics. He's currently perched on the Vacuum Form Table.

The articulated doll is getting it's final paint job today. I'll be sealing all the parts with Delta Ceramcoat varnish, then stringing it together. It will still be a few more days before it's finished, though. Sorry!

I may be starting a new doll later today. I've been working on some sketches. So, that's it for now, I'll be back tomorrow.

Wednesday, January 26, 2011

A picture


Today I have to work on a picture I promised someone. It's potentially a tattoo, but I'm not sure. All I know for sure is that he wanted it roughly the same size as my tattoo (Yes, I have a tattoo...mwhahahah). I finished up the black and white, and I'm going to photoshop some color into it, today.

This is not my normal 'here's what I'm working on that will be done in a few weeks' post, but more of a here's something I'm finishing up today. I'll be working on tons of other stuff soon, though.

Tuesday, January 25, 2011

Oopsie


I was so busy yesterday that I forgot to post anything! My bad. I've been working on several different projects, and some of them are closing in on finished. That's put me in a mad dash to finish them, of course.

The Story Teller is finished. He's the guy pictured. I will take better pictures of him later, but right now the light isn't good enough for great photos of him. He's been a long time in the works, and I'm glad to have him done. Now, though, I just want to start another giant doll! Maybe I will, later.

The vacuum form table is still waiting on it's frames, then I intend to abuse and abuse it. I tested it's seals over the weekend, and everything seems to be in order. So, as soon as I get frames, something will be formed!

The new 'Secret Doll' is getting some articulation in the form of elastic bands, we'll see how well that works out in the next few days. I won't post the doll until it's finished though...even though I would normally not mind showing it off. This time, I have my reasons.

Kitchen cabinet rabbits are coming along. As soon as I have all six cut out, I will take down the cabinet doors and finish off this project. Pictures and info and all that will come once I do.

That's it for now. Enjoy the only pic of the story teller!

Friday, January 21, 2011

Showing off my Koopa


This fellow is my Koopa Trooper. He's just shy of 16 inches tall, and each block is 5/8"X5/8"x5/8". He hangs out in the living room, just inside the door. I am not sure what possessed me to make him, but I can tell you how I did it.

First, I found a sprite of the Koopa. (If you all aren't in the know about such things, the sprites are the 'models' used in the older games. This one is a Super Mario World sprite from the 16bit Super Nintendo system). I blew it up, printed it out, and drew a grid over it so I could see how many 'pixels' I would need. Turns out I needed roughly ...a bunch. I think it was around 244? But I'm no longer sure of the number.

I bought some bitty little wooden cubes from Hobby Lobby, while all their wood stuff was on sale, and I painted them with acrylic paint. I counted out how many light green cubes, dark green cubes, black cubes etc. I would need then divided them up and painted 'em all. It was a slow process.

After all the painting, I glued them together with wood glue, starting at the bottom and working my way up, one row at a time. I found it was easier to glue a whole row together at once, or at least big parts of the rows, then glue them to the existing rows. That kept things mostly straight. There's obviously some distortion in him, but I liked it, so I left it.

After he was all glued up, I left him to dry for a day or two, then propped him up on the mantle. I was afraid to put him anywhere else, cuz I thought he would break. He's tough, though. He lives happily on the floor, now. Maybe some day he'll get some company, like say a Boo to hang on the wall above him.

Thursday, January 20, 2011

Boxes, Sculpting, Painting

Today, instead of moving forward on any of the stuff I've talked about in the past week or so, I'm ending up working on a bunch of things that are kind of under the radar.

I just got done staining three wood boxes. I also stained my fingers, but that's beside the point. The boxes are all wood burned with different stuff on them, and they look fairly good, especially as I've never stained wood before. One has a donkey on it, one has a fox on it, and the last one has a pair of bunnies on it.

I've been working slowly slowly on a new doll, and I'm working on improving articulation, so hopefully this one will be more poseable than the ones in the past. If it works out, I'll go into it in more detail later.

I'm also going to be working on my Story Teller doll, who is easily the biggest doll I've ever attempted. He'd be over two feet tall, standing. He needs pants and boots and some paint on his neck and he's pretty much done. Can't wait to be showing off this guy.

For now, that's it. Once the boxes are fully stained, I can reclaim my art desk and will use it to work on my kitchen cabinets. For now, I have to wait, because if I get glue on the kitchen table, I'll never hear the end of it.

Wednesday, January 19, 2011

Key Chains


I have made my masters, made the molds, and poured some key chains! …and painted them. Anyway, here they are. I am sure that EVERYONE EVER will agree that there is something grossly wrong about the lack of gas mask key chains in the world. I’m here to solve that. Also, at least some people will agree that there are not enough sexy naked fox girl key chains, as well, so I did that, too.

As for the bad news: I’m having issues with air bubbles in both molds, but in the fox girl, they are almost insurmountable. The gas mask isn’t so bad, but it’s bad enough that it slows down my making of them. Also, the fox girl’s paint job is a little complex for me to just mass make these things to sell, so she may never be a sold product. This makes me sad, but it may happen!

I’m digging through every set of tips and tricks I can find involving the casting process I am using, and I will keep you updated on what works!

Also, if Austrich reads this, you have a gas mask key chain waiting on you.

Tuesday, January 18, 2011

Vacuum Form Table part 2


As promised, here's the beast! Isn't it beautiful? I particularly love the simulated wood grain finish with the lime green plastic. It has all the elegance and beauty of a early 80s station wagon.

The thing on the side of the bucket is an adapter for the Shop Vac. I just cut a hole in the bucket, then caulked the adapter up tight. The top started life as an entertainment center. I think that it's more entertaining now than it ever was while holding up a television. It's just a piece of particle board with holes drilled into it. The bucket is also the vacuum chamber, and well...using a poo bucket to make my own plastic crap seemed appropriate.

I've wanted to make one of these things for forever, but I was always intimidated by the various schematics, etc. that you can find on the internet. Apparently, it's just as simple as you want to make it. Crazy huh?

I still need to build frames to hold the plastic, but after that, we'll form some stuff up and let you know how it works, and anything I learn from the process. Also as the second picture shows...don't drown babies in your vacuum forming table.